|
550 559 05 |
|||||||||||||||||||||||||||||||||||||||||||||||||||||||||||||||||||||||||||||||||||||||||||||||||||||||||||||||||||||||||||||||||||||||||||||||||||||||||||||||||||||||||||||||||||||||||||||||||||||||||||||||||||||||||||||||||||||||||||||||||||||||||||||||||||||||||||||||||||||||||||||||||||||||||||||||||||||||||||||||||||||||||||||||||||||||||||||||||||||||||||||||||||||||||||||||||||||||||||||||||||||||||||||||||||||||||||||||||||||||||||||||||||||||||||||||||||||||||||||||||||||||||||||||||||||||||||||||||||||||||||||||||||||||||||||||||||||||||||||||||||||||||||||||||||||||||||||||||||||||||||||||||||||||||||||||||||||||||||||||||||||||||||||||||||||||||||||||||||||||||||||||||||||||||||||||||||||||||||||||||||||||||||||||||||||||||||||||||||||||||||||||||||||||||||||||||||||||||||||||||||||||||||||||||||||||||||||||||||||||||||||||||||||||||||||||||||||||||||||||||||||||||||||||||||||||||||||||||||||||||||||||||||||||||||||||||||||||||||||||||||||||||||||||||||||||||||||||||||||||
|
|
|||||||||||||||||||||||||||||||||||||||||||||||||||||||||||||||||||||||||||||||||||||||||||||||||||||||||||||||||||||||||||||||||||||||||||||||||||||||||||||||||||||||||||||||||||||||||||||||||||||||||||||||||||||||||||||||||||||||||||||||||||||||||||||||||||||||||||||||||||||||||||||||||||||||||||||||||||||||||||||||||||||||||||||||||||||||||||||||||||||||||||||||||||||||||||||||||||||||||||||||||||||||||||||||||||||||||||||||||||||||||||||||||||||||||||||||||||||||||||||||||||||||||||||||||||||||||||||||||||||||||||||||||||||||||||||||||||||||||||||||||||||||||||||||||||||||||||||||||||||||||||||||||||||||||||||||||||||||||||||||||||||||||||||||||||||||||||||||||||||||||||||||||||||||||||||||||||||||||||||||||||||||||||||||||||||||||||||||||||||||||||||||||||||||||||||||||||||||||||||||||||||||||||||||||||||||||||||||||||||||||||||||||||||||||||||||||||||||||||||||||||||||||||||||||||||||||||||||||||||||||||||||||||||||||||||||||||||||||||||||||||||||||||||||||||||||||||||||||||||||
Digital I/O Channel
This section provides full details about the structure and contents of the Digital I/O Channels incorporated in the M36 series.
Channel Register Structure and Function
RegNo. 0: FlagReg
The FlagReg can be accessed as one Byte or as individual bits.
Bit 1: Error The purpose of the Error bit is to indicate an error condition on the channel (overload, underload and hardware errors). Error = TRUE, indicates ChError.Act <> 0.
Bit 3: Control The Control flag is used to control special functions (see ChConfig.Functions). After a power-up or a reset of the module, the Control flag is FALSE. If ChConfig.Functions is set to Input mode or Input hold mode the Control flag follows the InFlag.
Bit 6: InFlag The input flag is controlled by the input detector, and shows the logic level on the input terminals. The input flag is true, when the input is ON. If the channel is used as an output, the input flag will follow the output flag. If the output terminals are short-circuited, the input flag will not follow the output flag. The input signal can be simulated, by setting the channel into input simulation mode (ChConfig.Enablebit[0] = TRUE) and subsequently writing the state to the input flag. The input flag is FALSE after a reset in simulation mode.
Bit 7: OutFlag This flag shows the logic level on the digital output. When OutFlag is TRUE, the output is ON.
A P-NET transmission can control the OutFlag if the ChConfig.Function is set to Output Mode. In other cases, the OutFlag is controlled by the special output function, and the OutFlag is treated as a read only bit from P-NET.
After a power-up or a reset of the module, the OutFlag is FALSE.
RegNo. 1: IOTimer [s]
Each channel has a timer, used with the special functions. The timer is either preset via P-NET, or from the OutputPreset.OnPreset / OffPreset or InputPreset registers, depending on which function is selected for the channel. The timer counts down. The count continues through negative values. The timer register is cleared after a power failure.
RegNo. 2: Counter
The counter counts the number of pulses at the input. The counter counts up to a maximum of 2147483647 (a LongInteger). When the counter exceeds +2147483647, it re-starts at -2147483648. The counter increments by one, on a rising edge at the input.
RegNo. 3: OutCurrent [A]
The OutCurrent register indicates the value of the current in the output load.
RegNo. 4: Operatingtime [s]
This variable totalises the time period during which InFlag is True.
RegNo. 5: LevelVoltage
The LevelVoltage register indicates a value derived from the voltage at the Input / Output terminal. From the factory it is calibrated to show the voltage, based on the calibration factors VoltageScale.Fullscale and VoltageScale.Zeropoint. As such, it can be used as an Analogue voltage input in the range of 0 to 11 V DC (0 to 10 V plus overshoot).
RegNo. 6: MinMaxCurTimer [s]
The MinMaxCurTimer is used together with the Min/MaxCurrent. The MinMaxCurTimer is preset from OutputPreset.MinMaxCurPreset when the output is changed. The timer counts down. The count continues through negative values. The timer register is cleared after a power failure.
RegNo. 7: InputPreset [s]
This register holds the preset value for the IOTimer when the channel is in Input hold mode, Input delay mode or Input edge detect mode.
RegNo. 8: OutputPreset [s]
This register holds the preset Values for the IOTimer and the preset value for the MinMaxCurrentTimer. The preset values are passed to the timer by the special functions. The IOPreset variable is a record having the following structure:
RegNo. 9: ChConfig
The ChConfig variable is a record having the following structure:
where each field is interpreted as follows:
Enablebit:
InputSimulation must be used with the utmost care because whenever simulation mode is deselected, the input will remain in the state the user left it, regardless of the actual signal level on the input. The real input level can only be detected again after a reset, or following a positive or negative input change, because the input state is based on edge detection.
Functions:
Input mode. InFlag and Control bits are controlled by the input detector, and show the logic level on the input terminals.
Input hold mode. (Only PD 620 ver. 1.11 or higher)
The IOTimer is preset from InputPreset on a rising edge at the input.
Output mode. The output can be controlled by writing to OutFlag from P-NET.
Follow mode. The output follows the Control flag.
Toggle output. Precise Function description:
After reset: FlagReg[Control]:= False; FlagReg[OutFlag]:= False;
IF FlagReg[Control] THEN (* Write to Control flag from P-NET *) FlagReg[OutFlag] := NOT FlagReg[OutFlag] ELSE FlagReg[OutFlag] := False;
One shot output. If the Control flag is set to True, the output will be set True for a period equal to the value of OutputPreset.OnPreset. The time can be varied by reloading the IOTimer. The Output is reset if the Control flag is set to False.
Precise Function description:
After reset: FlagReg[Control]:= False; FlagReg[OutFlag]:= False;
IF FlagReg[Control] THEN (*Write to Control flag from P-NET *) BEGIN FlagReg[OutFlag] := True; IOTimer := OutputPreset.OnPreset; END ELSE FlagReg[OutFlag]:= False; IF FlagReg[Control] THEN (*Write to IOTimer from P-NET *) IF IOTimer < 0 THEN FlagReg[OutFlag] := False; ELSE FlagReg[OutFlag] := True; LOOP IF FlagReg[Control] THEN IF IOTimer < 0 THEN FlagReg[OutFlag] := False; END;
Duty-cycle Output. This function can produce a variable duty-cycle output. The On time is specified in OutputPreset.OnPreset and the total period in OutputPreset.PTPreset.
Precise Function description:
After reset: FlagReg[Control]:= False; FlagReg[OutFlag]:= False;
IF FlagReg[Control] THEN (*Write to Control flag from P-NET *) BEGIN FlagReg[OutFlag] := True; IOTimer:= OutputPreset.OnPreset; END ELSE FlagReg[OutFlag] := False;
LOOP IF (FlagReg[Control]) AND (IOTimer <= 0) THEN BEGIN IF FlagReg[OutFlag] THEN BEGIN FlagReg[OutFlag] := False; IOTimer := OutputPreset.PTPreset - OutputPreset.OnPreset; END ELSE BEGIN FlagReg[OutFlag] := True; IOTimer := OutputPreset.OnPreset; END; END; END;
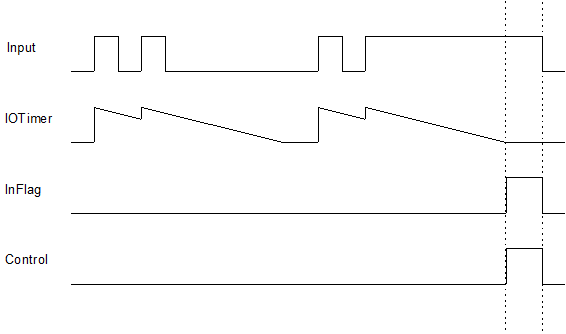
Input delay mode. (Only PD 620 ver. 1.11 or higher) By using this function, it is possible to specify a time delay between when an input is detected on the input terminal and when the InFlag and Control flags are set True.
Input delay mode provides a filter on the input that ensures that the InFlag is only set True if the signal is stable during the entire period when the IOTimer is decrementing towards zero. This mode also avoids the counter being incremented if the input is ON for a shorter period of time than that specified in the InputPreset register.
Precise Function description:
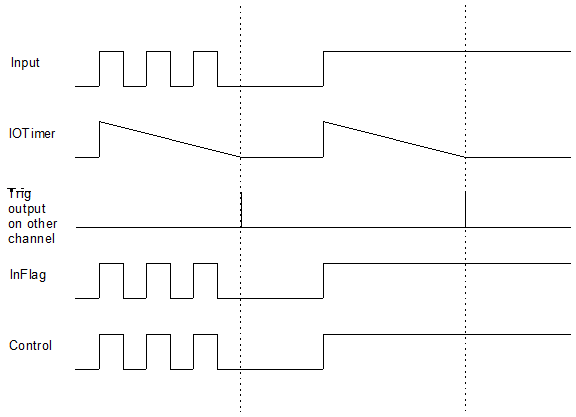
Input edge detect mode. (Only PD 620 ver. 1.11 or higher) This function will cause the IOTimer to be preset when a positive edge is detected on the input terminal. The IOTimer will decrement down to zero, and this can be used to trigger the output on another channel. As shown below, the IOTimer cannot be preset again until its value reaches zero or contains a negative value.
When InputPreset is <= 0 one or more outputs in the module that are pointing to this input can be activated immediately or delayed by a positive time specified in InputPreset.
Precise Function description:
Notification:
A bit in the Notification register in the Service Channel will be set if the condition described for any bit that is set in this Notification field has been met. The Notification bit number in the Service Channel register will correspond with the channel number that detected the condition.
ControlledbyChannel: (Only PD 620 ver. 1.11 or higher) The value inserted in this field defines (points to) the channel number that is to control this channel when it is configured as an output.
The table bellow shows which output functions that can be controlled by other functions.
RegNo. 11: MinMaxCurrentThis variable is a record having the following structure:
MinCurrent: This variable defines the minimum permitted current in the load when the output is ON. If OutCurrent is less than MinCurrent when the output is ON and the MinMaxCurTimer < 0, an error can be generated. Error-code generation is enabled by setting ChConfig.Enablebit[5] TRUE (underload alarm).
Precise Function description:
MaxCurrent: If OutCurrent exceeds MaxCurrent and MinMaxCurTimer < 0, the output is switched off and an error is generated. For applications in which it is normal to let the max. current switch the output off, the error-code generation can be disabled, by setting ChConfig.Enablebit[6] TRUE (no overload alarm). Any output current > 2 Amp switches the output off instantly.
Precise Function description:
IF ((OutCurrent>MinMaxCurrent.MaxCurrent) AND (FlagReg[OutFlag]) AND (MinMaxCurTimer < 0)) OR (OutCurrent > 2.0) THEN BEGIN FlagReg[OutFlag] := False; FlagReg[Control] := False; IF NOT ChConfig.EnableBit[6] THEN BEGIN ChError.Act[OverLoad] := True; ChError.His[OverLoad] := True; END; END ELSE ChError.Act[OverLoad] := False;
RegNo. 12: VoltageScaleThis variable is a record having the following structure:
How to measure an external voltage signal
When using the input for analogue measurement, some conditions must be considered. The input voltage should be held at a maximum of approximately 10 volts, since the circuitry is designed for this voltage level.
If the measured voltage is for example 24 V with ± variations, a voltage range from 0 to 30 V is suitable. To obtain this, a voltage divider must be designed so that the input voltage level is ⅓ of the total voltage.
To read out the voltage supplied to the input in the corresponding scale in VIGO, the nominal value of 15 volts as well as the FullScale register are used for the calculation: 15/10 × 30 = 45.
Any electronic equipment has an internal resistance. To prevent a too high influence of the internal resistance, the voltage divider should be designed for low value resistors. However, the maximum wattage for the resistors should be taken into consideration.
Due to natural tolerances in the electronic components as well as the influence of the internal resistance of the module, the described method may not lead to a totally precise measuring result. A manual calibration is therefore required, which means that the calibration factor 45 has to be adjusted slightly.
With up to 30 volts input, resistor values of for example 360 W and 180 W, respectively, could be an option to obtain a useful result.
The described method may also be used to measure the voltage supplied to the electronic modules. In such case, a similar voltage divider is applied. Instead of connecting the divider to an external power supply, the + and ÷ terminals of the base module are used.
It must be underlined that it is fully up to the user how to apply the analogue function and how to choose suitable resistor values for the voltage divider. PROCES-DATA does not provide additional information, and neither do we guarantee correct measurements.
Calculating the units for the FullScale and ZeroPoint fields
As mentioned in the previous section, the FullScale register contains a factory calibration factor centred on the nominal value of 15, which then enables a measurement of a voltage applied to the input terminal to be seen in the LevelVoltage register, without any further adjustments being necessary. The actual value is likely to vary slightly from nominal, due to natural tolerances within the electronics. Remember to use a voltage divider according to the description to minimise the influence. In order to obtain the maximum precision if changing the unit of measurement, the initial FullScale factor setting for each channel should be noted, for use in future calculations. The nominal value relates to the theoretical maximum voltage that could be applied to an input terminal when configured for analogue input. However, the maximum voltage actually applied to an input when so configured, should be restricted to a working range 0 – 10 volts +10% max. See the examples, all based on the nominal value, which also include calculations for finding the ZeroPoint value.
Example1. Requirement for a 0 – 10 volt input signal to indicate 0 – 10 volts. What should the FullScale register contain for an equivalent input of 15 volts? 15/10 * 10 = 15 What should the ZeroPoint register contain for an input of 0 volts? Since it is required that an input of 0 volts should read 0 volts, this register should contain 0
Example 2. Requirement for a 0 – 10 volt signal to indicate 50 bar pressure. What should the FullScale register contain for an equivalent input of 15 volts? 15/10 * 50 = 75 What should the ZeroPoint register contain for an input of 0 volts? Since it is required that an input of 0 volts should read 0 bar, this register should contain 0
Example 3. Requirement for a 0 – 10 volt signal to indicate 0 – 2000 ppm acid. What should the FullScale register contain for an equivalent input of 15 volts? 15/10 * 2000 = 3000 What should the ZeroPoint register contain for an input of 0 volts? Since it is required that an input of 0 volts should read 0 ppm, this register should contain 0
Example 4. Requirement for a 2 – 8 volt signal to indicate 0 – 2000 ppm acid. What should the FullScale register contain for a theoretical input of 15 volts? (15 – 2) / (8 – 2) * 2000 = 4333.333 What should the ZeroPoint register contain for an input of 0 volts? (0 – 2) * 2000 / (8 – 2) = -666.667
Example 5. Requirement for a 1 – 10 volt signal to indicate 2 – 40 m/s wind speed. What should the FullScale register contain for a theoretical input of 15 volts? 2 + (15 – 1) / (10 – 1) * (40 – 2) = 61.111 What should the ZeroPoint register contain for an input of 0 volts? 2 + (0 – 1) * (40 – 2) / (10 – 1) = -2.222
RegNo. 13: MaintenanceThe Maintenance variable is used for service management and maintenance purposes, and holds the last date of service (Date, Month, Year), and an indication of the type of service (Category).
Maintenance is a Record having the following structure:
RegNo. 14: ChTypeFor the digital I/O channels, ChType is a record having the following structure:
ChType has the following value:
ChannelType = 15
Exist =
Functions =
RegNo. 15: CHError
The 8 bits in ChError.His and ChError.Act have the following meaning. When an error occurs, the corresponding bit is set in both ChError.His and ChError.Act. When the error disappears, the bit is cleared in ChError.Act. The corresponding bit in ChError.His remains set until it is read, whereupon it is cleared automatically. See summary for how ChError.His can be cleared in particular M36 slave modules.
|
|||||||||||||||||||||||||||||||||||||||||||||||||||||||||||||||||||||||||||||||||||||||||||||||||||||||||||||||||||||||||||||||||||||||||||||||||||||||||||||||||||||||||||||||||||||||||||||||||||||||||||||||||||||||||||||||||||||||||||||||||||||||||||||||||||||||||||||||||||||||||||||||||||||||||||||||||||||||||||||||||||||||||||||||||||||||||||||||||||||||||||||||||||||||||||||||||||||||||||||||||||||||||||||||||||||||||||||||||||||||||||||||||||||||||||||||||||||||||||||||||||||||||||||||||||||||||||||||||||||||||||||||||||||||||||||||||||||||||||||||||||||||||||||||||||||||||||||||||||||||||||||||||||||||||||||||||||||||||||||||||||||||||||||||||||||||||||||||||||||||||||||||||||||||||||||||||||||||||||||||||||||||||||||||||||||||||||||||||||||||||||||||||||||||||||||||||||||||||||||||||||||||||||||||||||||||||||||||||||||||||||||||||||||||||||||||||||||||||||||||||||||||||||||||||||||||||||||||||||||||||||||||||||||||||||||||||||||||||||||||||||||||||||||||||||||||||||||||||||||||